

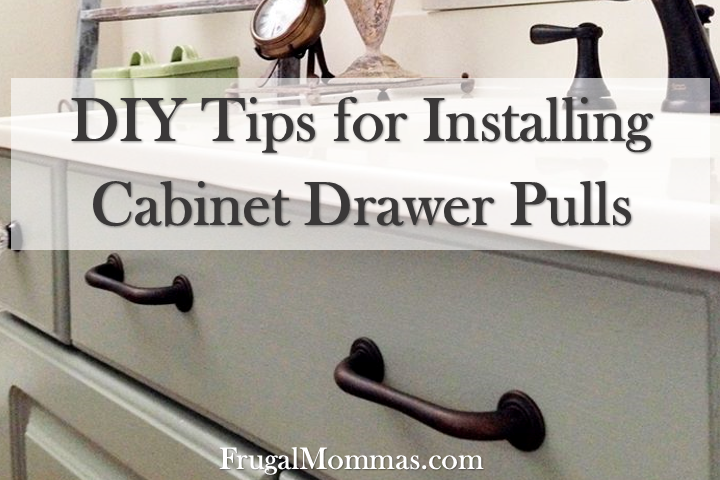
DIY Tips – Cabinet Drawer Pulls
Last week, I completed an update on my third bathroom vanity. YAY!! I’m so thrilled to have these re-dos behind me and so very excited to share some juicy DIY tidbits I learned along the way. I’ve wanted to upgrade my bathroom for what seems like forever and now that these vanities are done, I think I’m ready to start on a bigger project. I’ve seen some frameless shower doors that I really like the look of as well as some funky taps and they’ve inspired me to renovate the whole bathroom, not just the vanities. However, I haven’t quite settled on a theme just yet so I think it’ll be a few weeks before I start ripping our current bathroom apart. All three vanities were builder’s grade cabinets made out of white melamine with 1990s brassy knobs. Yeah. Not the easiest to upgrade without totally replacing the cabinet, but also…not impossible.
In the first makeover (the boy’s side of the Jack and Jill bath), brushed nickel knobs replaced similar brassy knobs. To add a little more flair, two pulls were installed along the front of the sink to create a faux drawer. It’s super easy and fairly quick to do. Once you’ve finishing installing these pulls, I would look at https://gracelandwindows.com/ to even further improve your home!
I’m excited to share with you these simple DIY tips for installing cabinet drawer pulls!
Tip #1 When buying the pulls, notice if the screws mount into the piece from the front or the back.
Since the screws on these pulls mounted from the back, the screw has to go all the way through the faux drawer front and the cabinet frame. 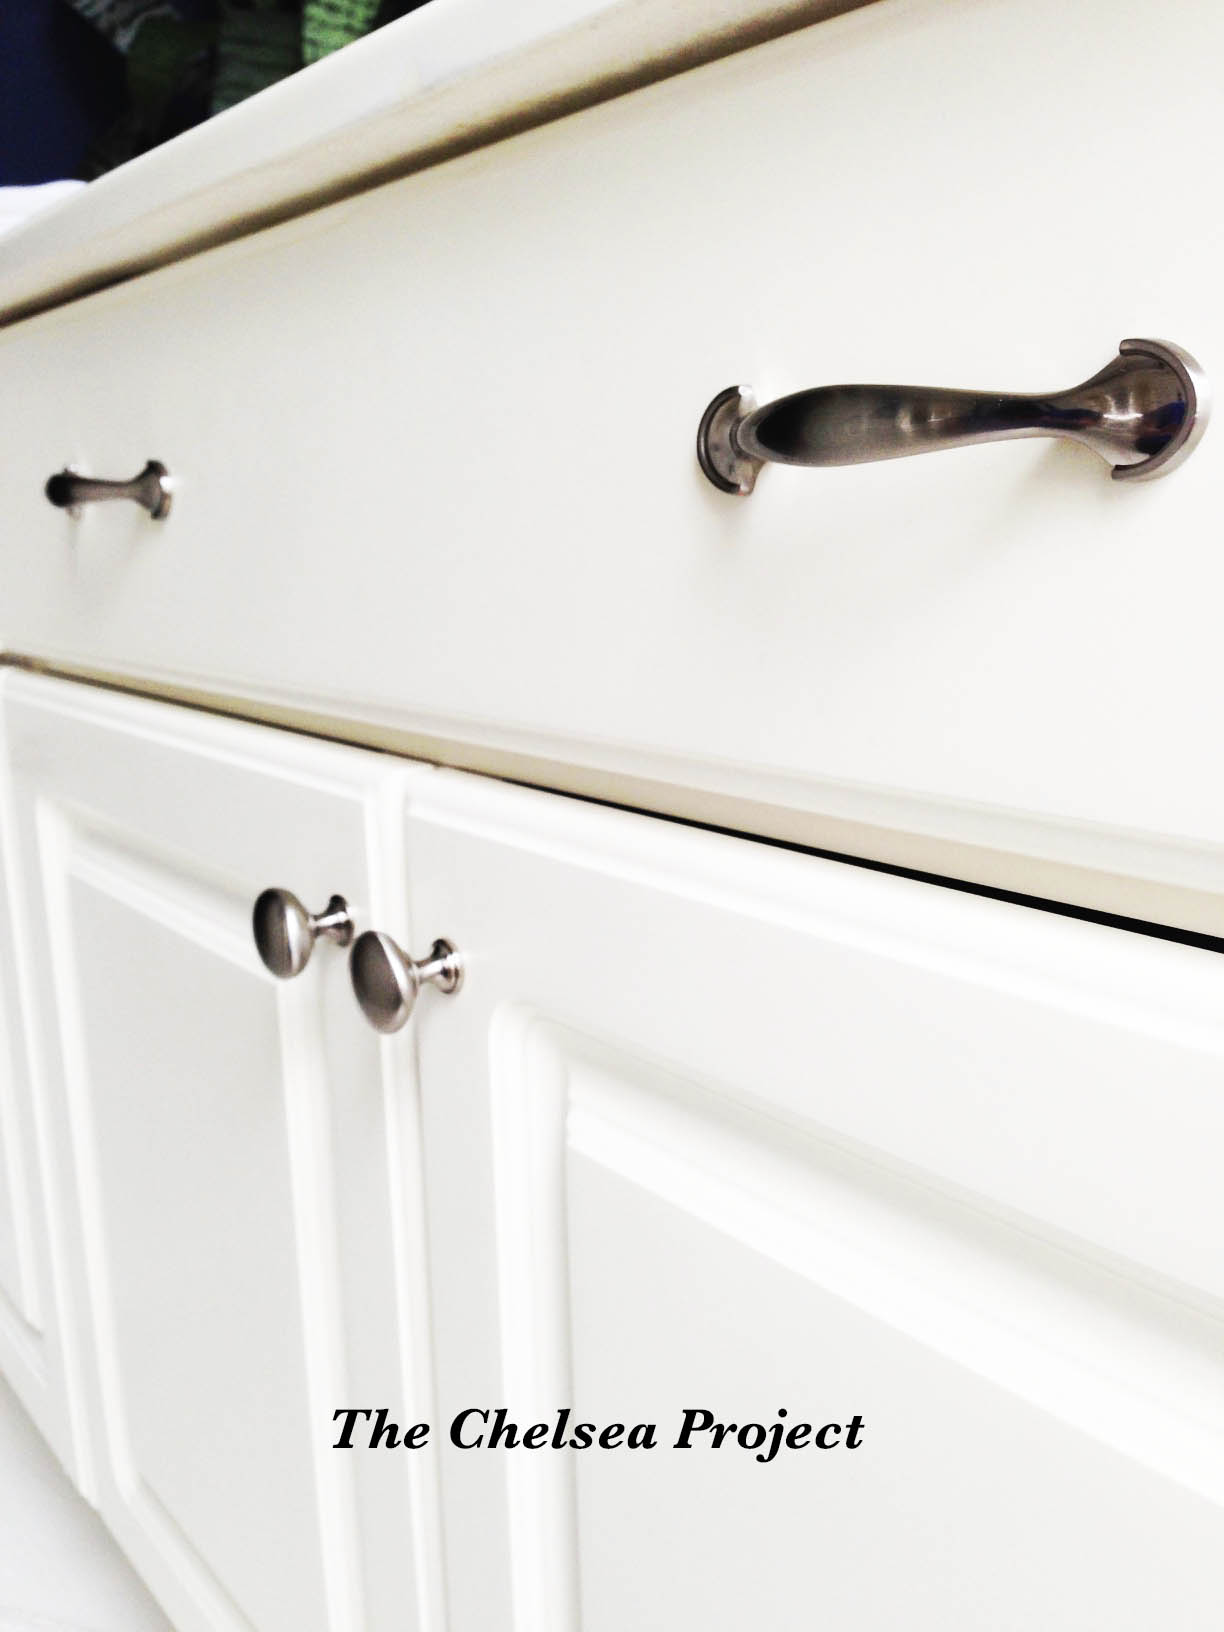
Naturally, the screws that came with the pull were too short, so I had to buy longer screws.
It’s no problem because the screws are readily available at the home improvement store. But, to make the installation easier, drill the pilot hole all the way through from front to back and be prepared to buy longer screws.
With this, you’re good to go.
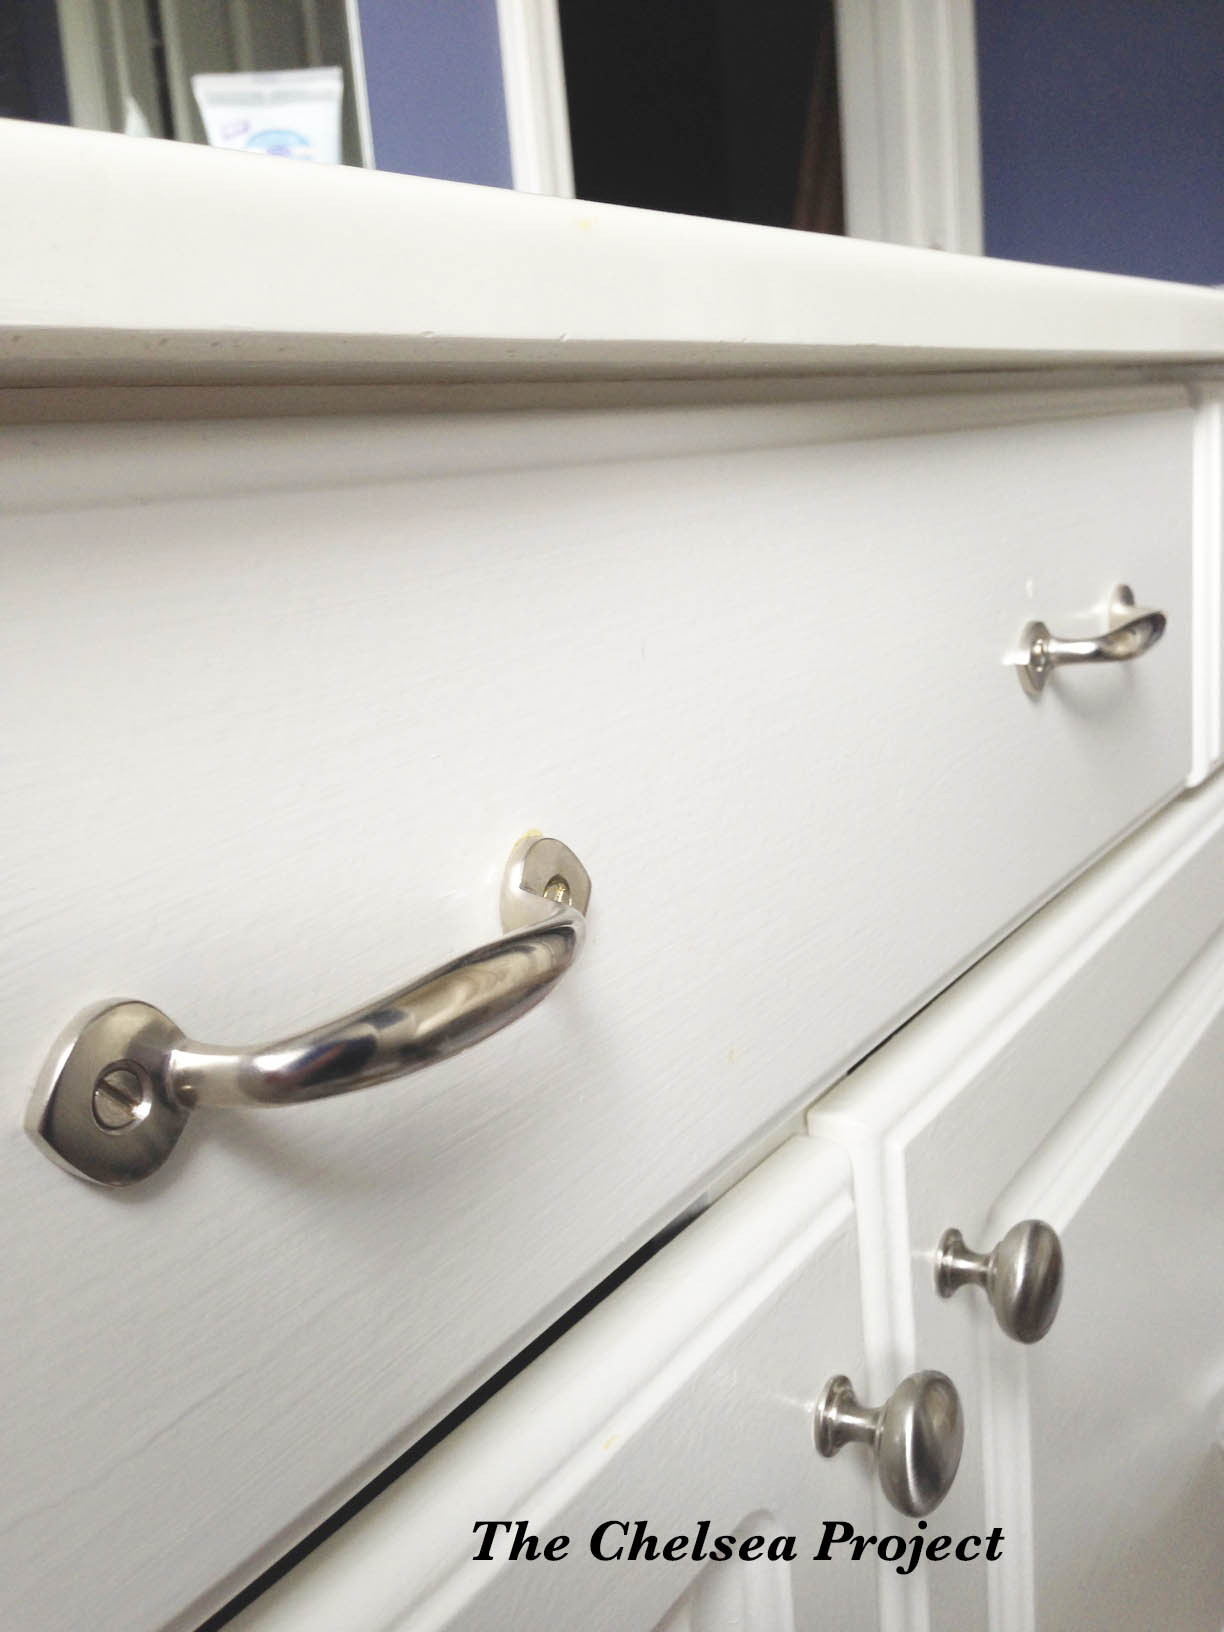
On the second vanity (the other side of the Jack and Jill bath), similar hardware was installed on the front to create another faux drawer, except this set of pulls has screws that mount from the front.
And, guess what?
The last screw broke going into the pilot hole. At this point, I either had to go buy four new screws so that the heads matched or just glue the screw with the broken head into the pilot hole.
Since this is only a faux drawer and wouldn’t have to hold up to stress, I opted for the latter.
Tip #2 When drilling the pilot hole, use a big enough drill bit so that the screw won’t break.
The pilot hole doesn’t need to go all the way through to the back, but the bore does need to be no less than one size smaller than the screw. And, even that can stress hardware screws.
Tip #3 If a screw head does break off of the screw, you can opt to attach it to the hardware with clear glue.
This might not work for a working pull, but for a faux drawer front, it works great.
If you look closely at the two drawer fronts, you can see that there is a slight difference in the pulls. This is because I had collected clearance rack hardware from various places. All of the colors match and the shapes are very similar. But, both vanites have identical knobs, so to the casual passerby, they are a match.
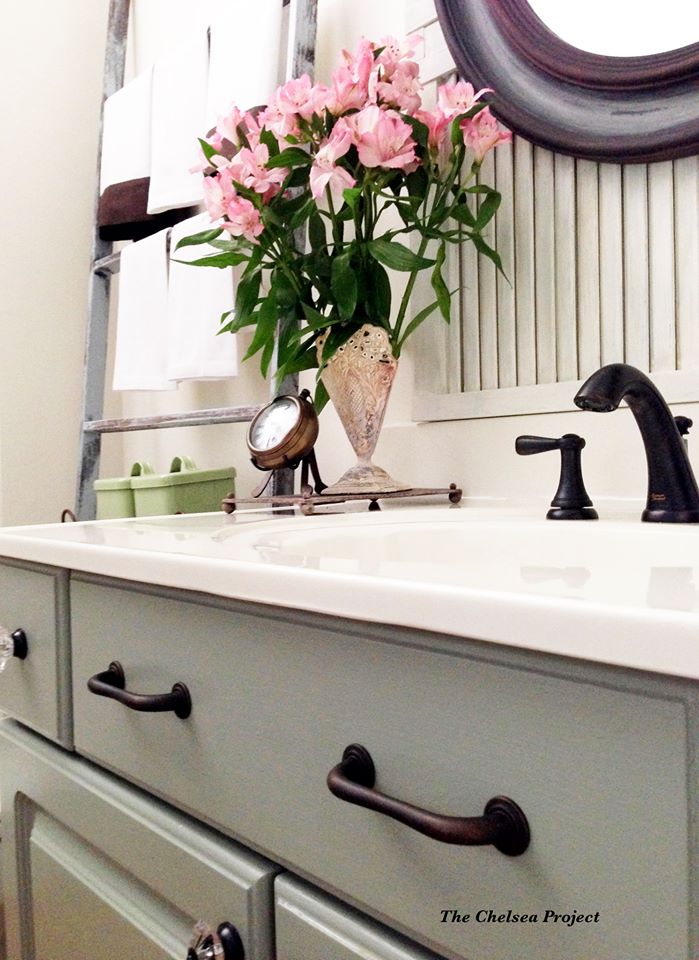
The third vanity has the same hardware setup as the other two, only this time, the knobs are vintage glass and the pulls are oiled-rubbed bronze. This creates an entirely different look even though the installation for all three vanites is basically the same.
Tip #4 Simple steps for installing cabinet pulls
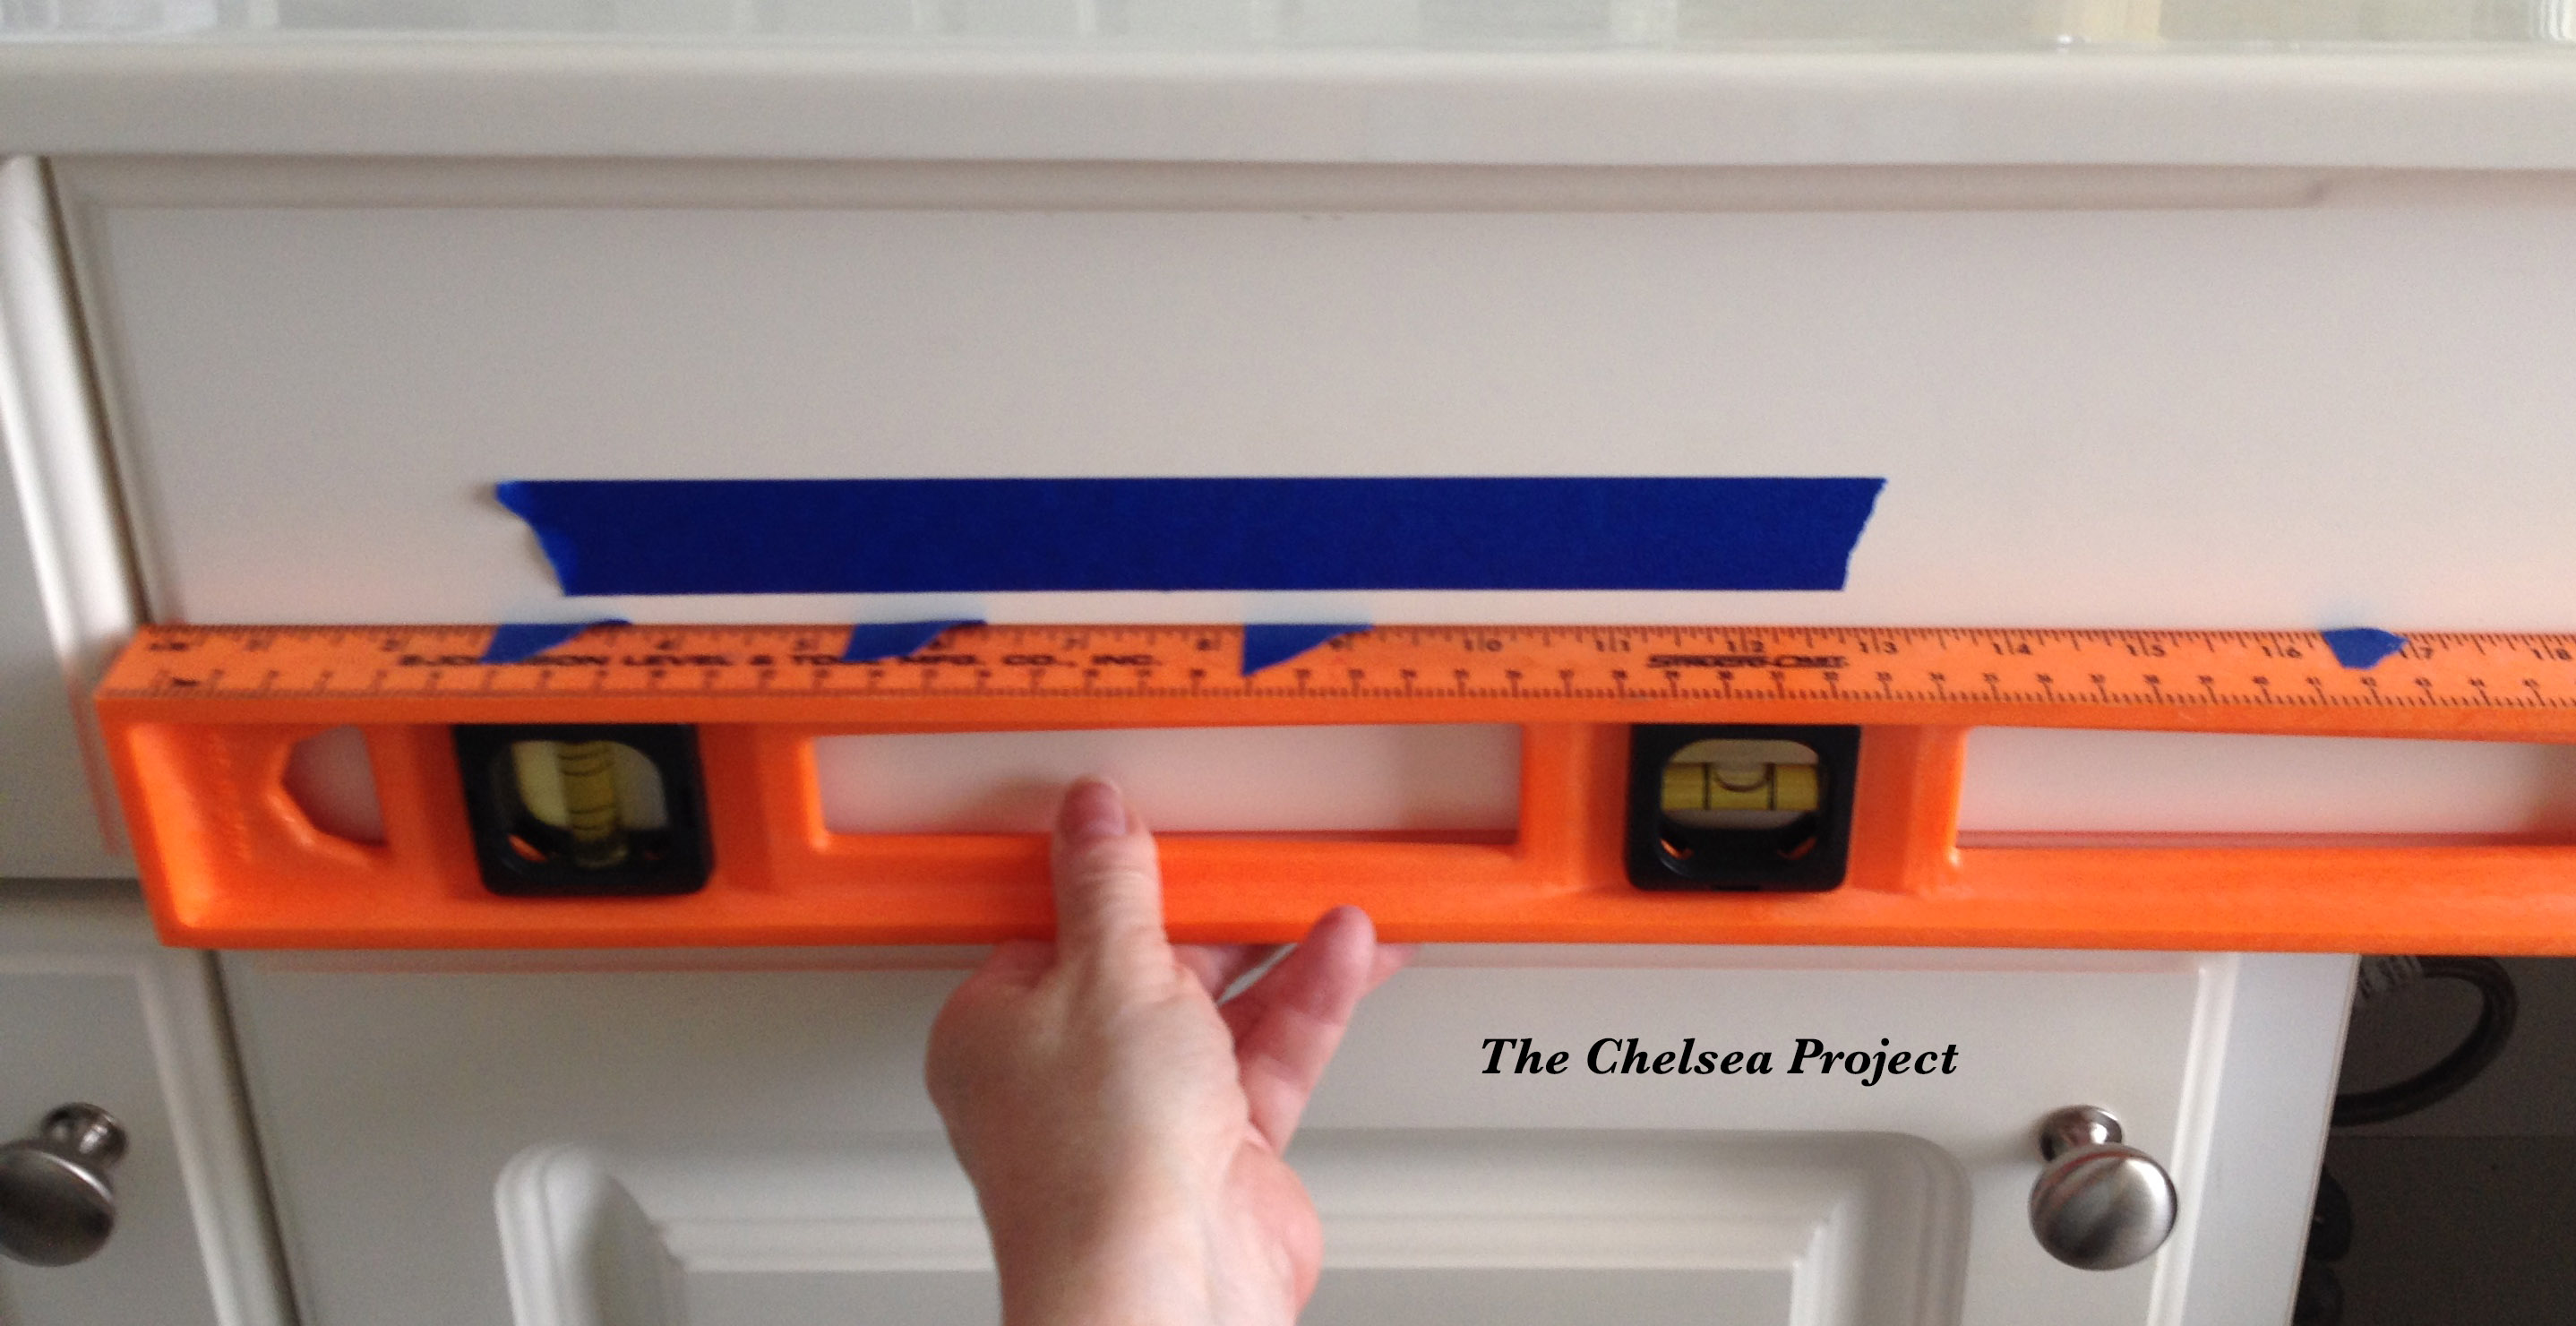
1. Find the center of the faux drawer front by measuring left to right and top to bottom of the drawer front. Then, attach a piece of painter’s tape across the width of the drawer front. Apply the tape as level as possible, but the final level will come next.
2. Once the tape is attached, mark the exact center (from left to right) in the middle of the tape and the exact center top to bottom on the tape. Then, using the level, draw a leveled-line across the width of the tape. Now, you have the exact center of the faux drawer and it’s on-level.
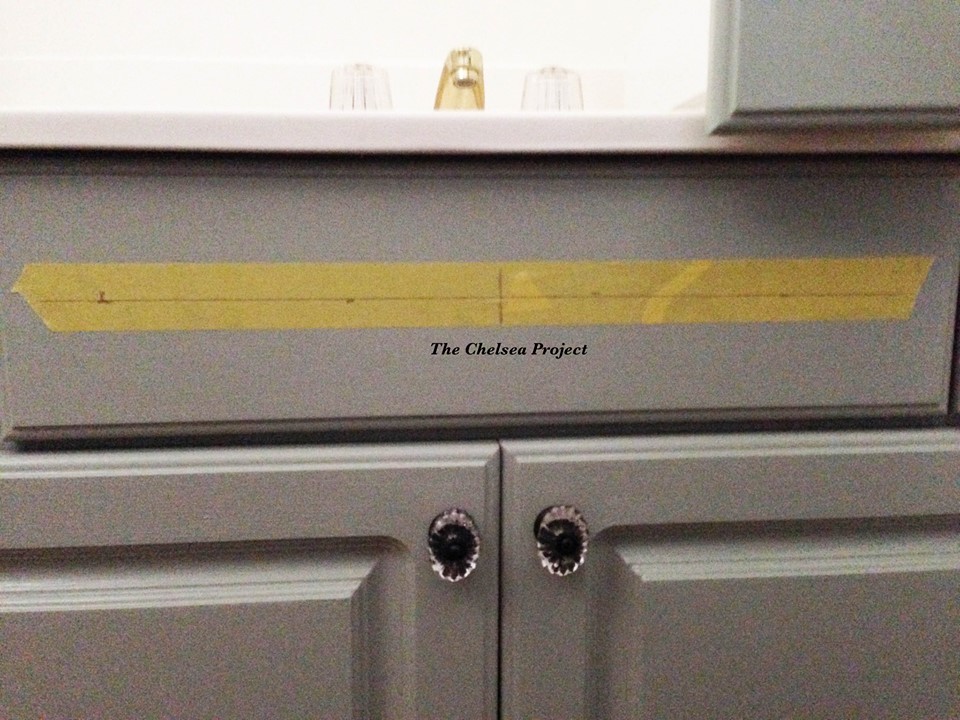
3. Next, stick a piece of tape across the hardware and poke holes where the screws will attach. Then remove the tape and line up the poked holes across the leveled-line on the drawer front. Stick the template tape to the leveled-line.
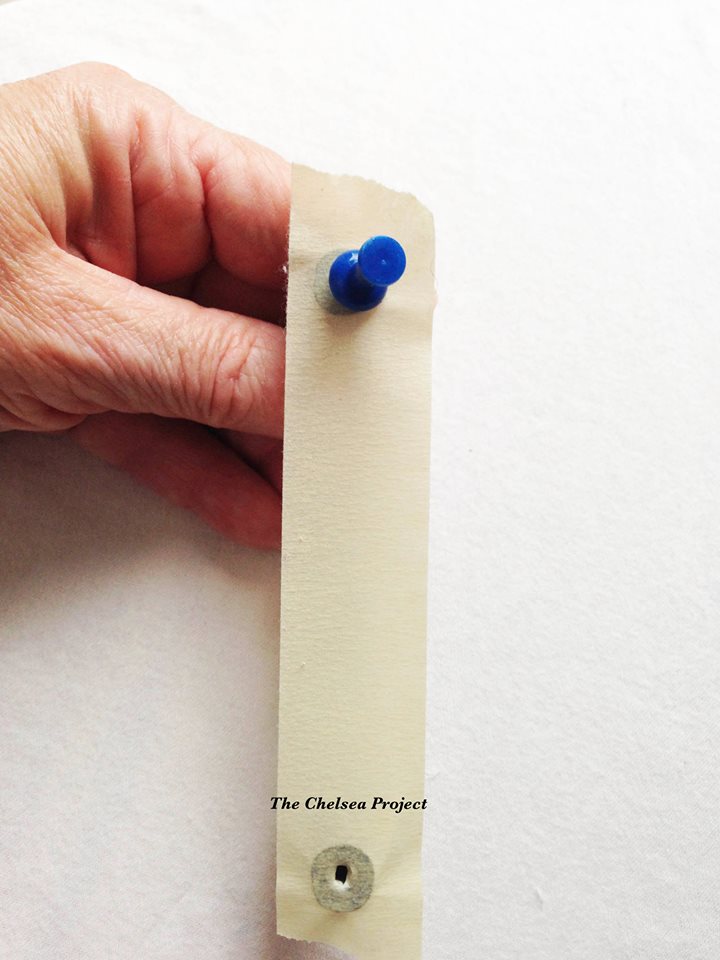
4. Drill the pilot holes right through the tape.
5. And, lastly, remove the tape and attach the hardware.
For more information on bath vanity makeovers, please check out my recent powder room renovation. The 1990s melamine vanity was refinished without stripping, sanding, or priming. New sink and cabinet hardware was installed. And, a boatload of accessories were made by upcycling thrifted treasures. (Here) The entire powder room reveal, including a bookcase and sitting bench installed in a most unusal place, can be seen (Here).
And, as always,
May God bless you in all that you do,
Susie
*As our resident expert in all things that are DIY, frugal, updates in the home – you will most often find Susie up on a ladder, under a cabinet, measuring or hanging some thing or another in her home – or blogging about it on The Chelsea Project.
Check out more of Susie’s posts as she shares tips and tricks that anyone can use for successful DIY!
How to Put the Fun into DIY Painting!
DIY Tips for Beginning Builders
Drawer Pulls


