

I believe that somewhere in all of us there’s a tiny little builder just waiting to get out. Need proof? Just look at Lego sales. Can you say …through the roof?
Yes, we are a nation of builders, all right. It’s just that sometimes, as we get older, we forget about how we used to make houses and cars and big ferris wheels. It seems that once we get busy being all grown up, the little builder takes a back seat or goes away altogether.
Well, take heart, little builder……you’re about to make a comeback.
Tip Number One:
If this is a first or even an early project, please take it slow and easy, taking on a big project without any experience will likely end up in a disaster, leave the house extensions to the professionals and only undertake a task that’s at your level.
This is best accomplished by starting small.
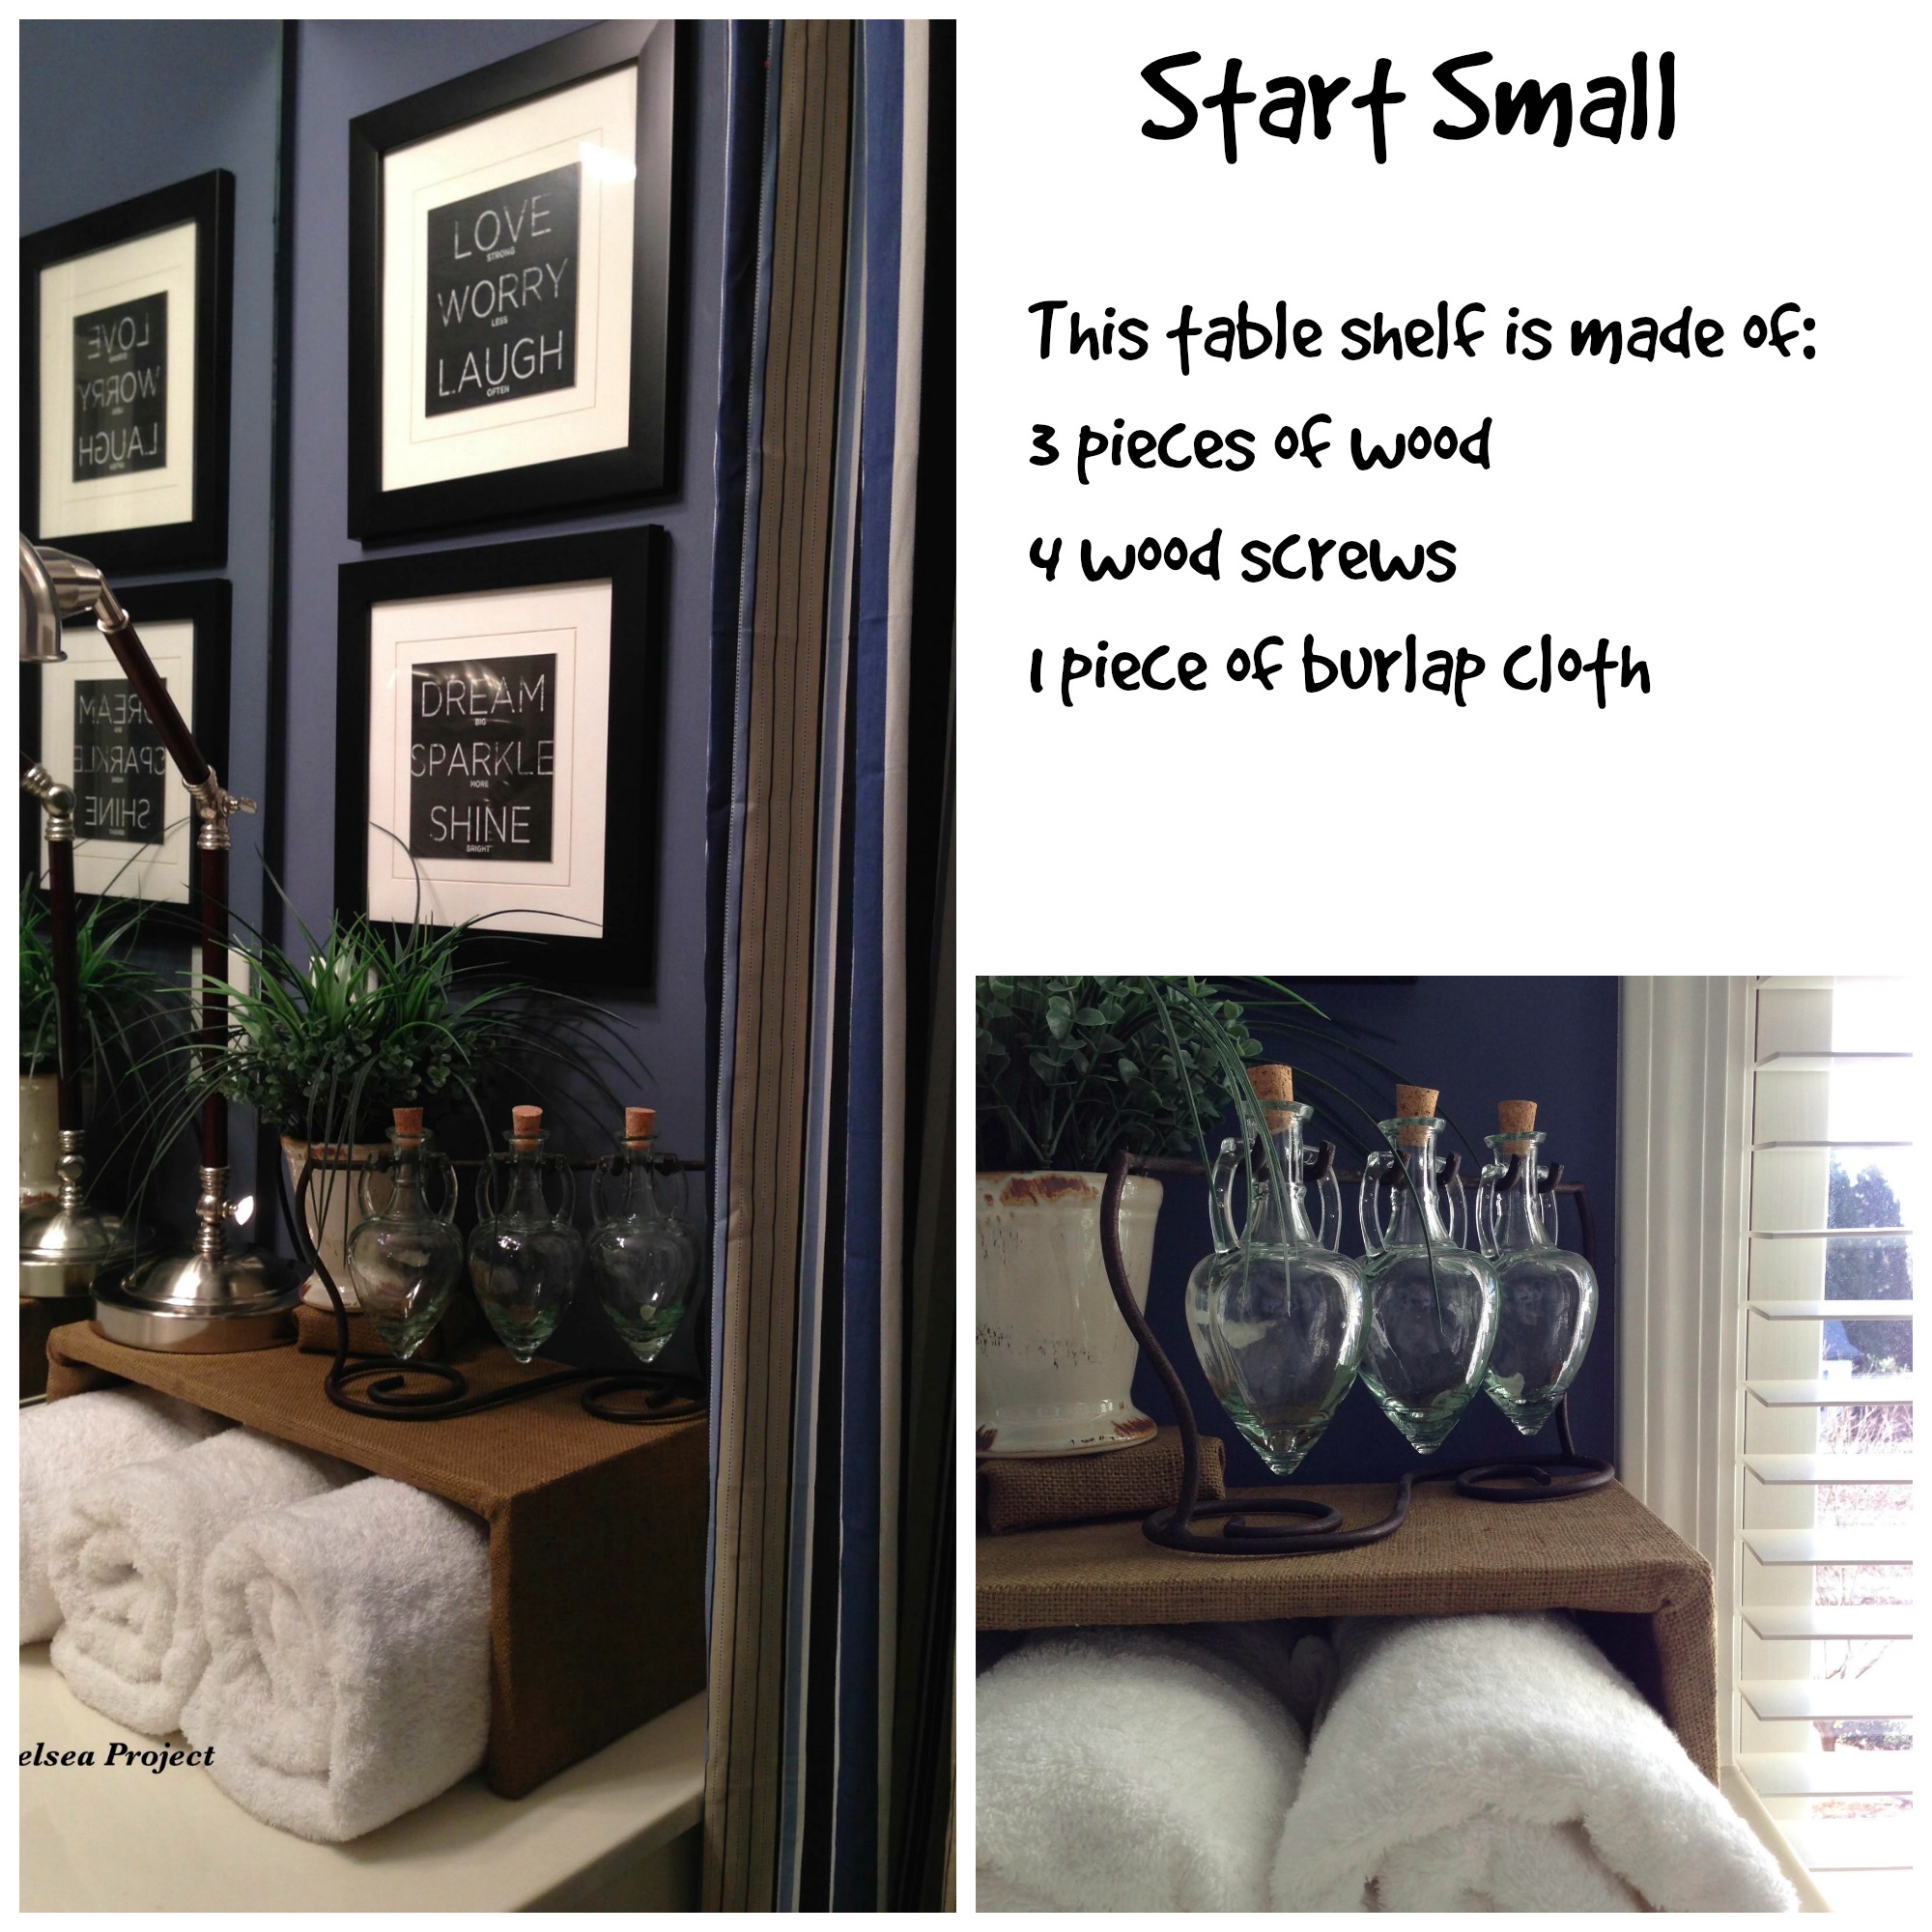 When I needed a lift and some storage space at the end of this bath vanity, the hubs
 whacked cut three pieces of wood and attached them with screws. The cuts weren’t pretty and the screws were in a little crooked, but it didn’t matter because the fabic covered the flaws.
Tip Number Two:
Invest in a good drill. It doesn’t have to be expensive, but make sure it is lightweight, easy-to-use, and reliable. I have a cordless drill with a light that shines on the screw. Oh, it’s wonderful. The light really comes in handy when making a pilot hole for a wall-hanging. I don’t know why, but these always seem to be in the hard-to-see shadows.Looking for a reputable supplier? Then be sure to do your research before investing any money in anything.
Then, invest in a good set of countersink drill bits. A countersink bit is used before the screw is attached to carve out a little wood. This way the screw “sinks” into the carved-out seat so the head won’t sit higher than the wood. It’s good to countersink every screw on a project so these bits will get a real workout.
Tip Number Three:
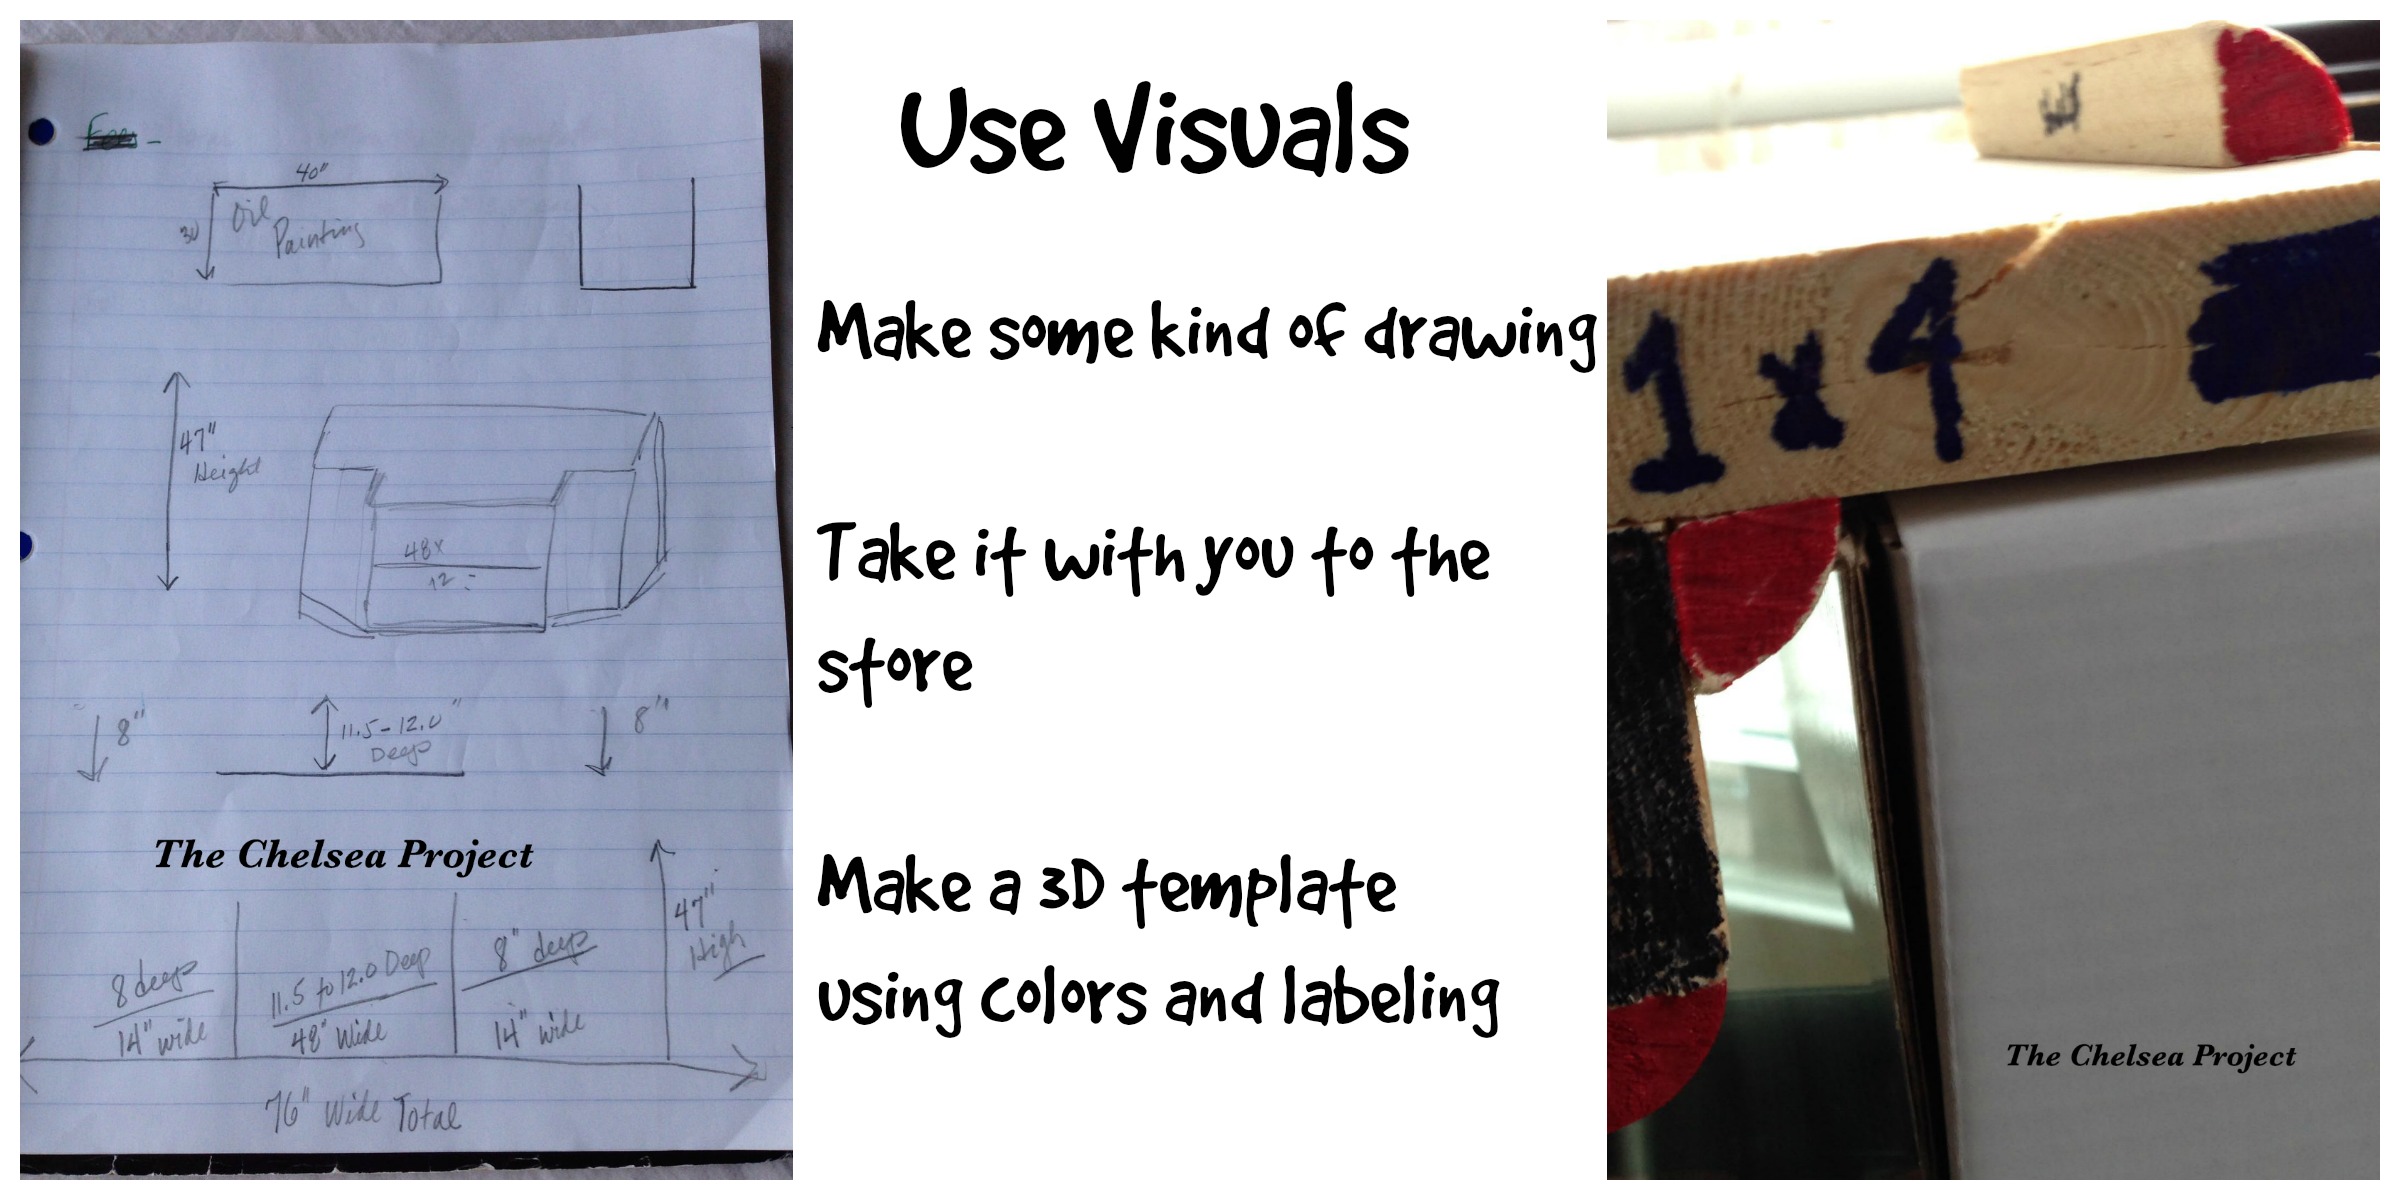 Visuals, even crude visuals, will make a world of difference. So get out those number twos and figure out the dimensions and the size of every single piece of wood before leaving for the home improvement center.
Tip Number Four:
Always have a fresh supply of wood glue, wood filler, and caulk. I actually look for ways to glue pieces together, rather than use screws. And, for cracks, gaps, and miscuts? Wood filler will be your BFF. Just drive it into the area with your fingers (don’t be stingy), let it dry, give it a light sanding, and poof. Gap gone. In contrast, caulk cannot be sanded so I use it sparingly and only in the joints.
With these tips for beginning builders, you’re good to go. Just remember to keep building simple and make it fun. And know that there’s no shame if you need to call in some help. Some jobs, like your garage door, should be handled by a professional spring repair service for safety’s sake after all. The last thing you want is to have an accident that causes some serious harm. If you’re working on a construction site and happen to have an accident, contact Nehora Law Firm for legal help and advice.
Until next time,
Happy building,
Suz
Check out more DIY tips and projects from Susie at The Chelsea Project & visit Frugal Mommas regularly to see how she takes everyday items and tools you usually have on hand to create a beautiful home environment. Let Susie show you how – You Can Too!